
In Part 2 of Introduction to WordPress we start talking about the main activity of most website owners: creating and editing content in the blog and elsewhere. The full series:
1. Logging in and getting around
2. Creating and editing posts and pages – you are here
3. More aspects of posts and pages
4. Inserting images into posts and pages
5. Comments and your account
6. Widgets (sidebar content)
Creating and editing posts and pages
One of the user-friendly aspects of WordPress is that different kinds of content are (mostly) edited in the same way. If you click “Add New” from the Posts dropdown or the Pages dropdown, the screens you get will be quite similar. The main portion of the screen will have a title entry box followed by a content entry box; the right sidebar will begin with a Publish box.
We’ll begin with those three pieces. First, an iThemes video about creating posts:
The title (starred in the screenshot below) will show at the top of the page or post and be part of the name in your browser history when you visit the page or post. Right below it will be the permalink, the address you can use to visit the post or page directly. You can edit the permalink manually with the Edit button next to it, or visit a preview of what you’re writing by clicking the permalink itself (conveniently the preview opens in a new tab).
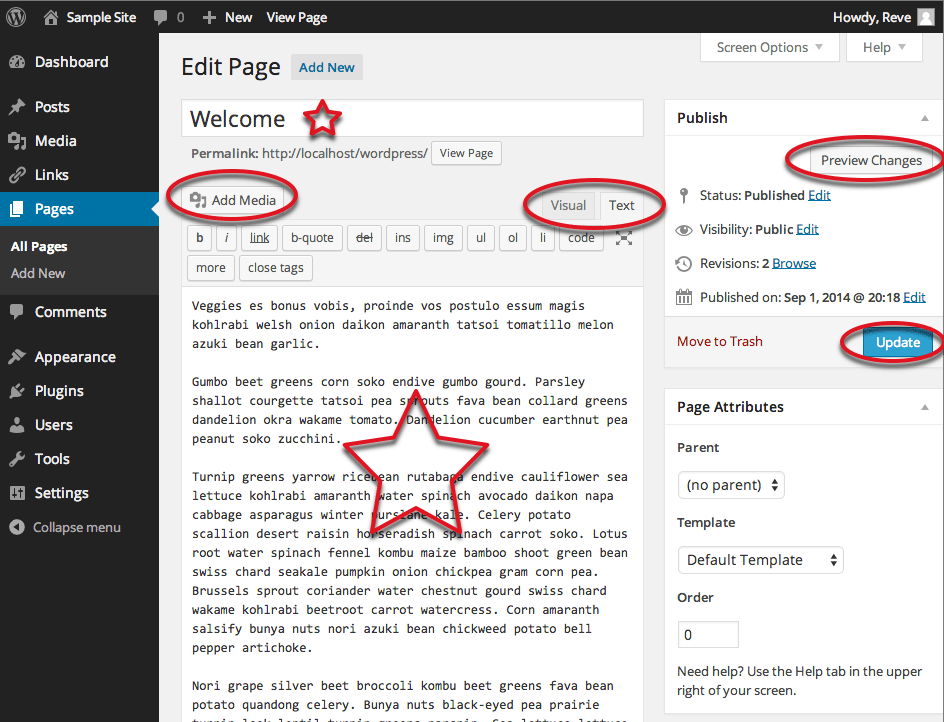
[Note: this screenshot does not show a permalink editing box because the page shown is set as the home page of the site, so its address must be the main address of the site.]
Below that is the main content box, also starred. It has a lot going on along the top (circled). There will be an Add Media button on the left (possibly others depending on what plugins you have) and your choice of Visual or Text on the right. Below that will be formatting buttons, different for Visual and for Text. The “Add Media” button is how you insert images; more on that later.
Visual is the Microsoft-Word-esque editor: your formatting shows to you. If you make something bold you’ll see it bold. Text is the HTML editor: if you make something bold you’ll see it with HTML “strong” tags around it. Just to note: Visual won’t always show your formatting exactly as it will show on the front end – your theme has to have told it to do so. However, it should be close enough to see what you’re doing unless your theme does very unusual things.
I won’t exhaustively cover the buttons across the top of the main content box; if you hover your mouse pointer over them a little tooltip will pop up and tell you the name of the button. However, a few are worth mentioning: the last two buttons insert a “more…” break, limiting the amount of your post that shows in the blog archive page, and show or hide a second row of buttons. In that second row, the middle two buttons are “paste as text” and “erase formatting.” If you paste formatted test in, for instance from an RTF file or a Word document, WordPress will do its best to replicate the formatting. If you don’t want it, you can click “paste as text” before pasting and get only content, no formatting. If some formatting doesn’t translate correctly or you decide to take formatting in a completely different direction, highlight the text and click “erase formatting” to clear it back to plain old content.
Now, an iThemes video about adding links:
They have one about formatting generally, but it won’t embed, so you’ll have to watch it on Vimeo: WordPress post formatting video from iThemes.
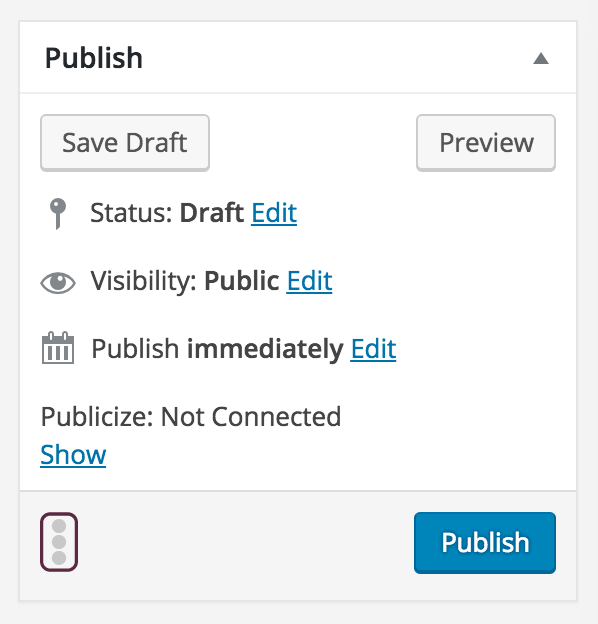
From the Publish box in the upper right (shown below for a draft and in the screenshot above for a published page), in addition to actually publishing the post or page, you can save your post or page as a draft to work on later, edit its privacy settings, preview it, and schedule it to publish at a later time. That last happens by clicking the “Edit” link at the end of the “Publish immediately” line. That will open up a spot to put in a date and time for publication. If you put in a future time you should see the “Publish” button change to “Schedule” after you click OK. Once a post or page is published that button will become “Update.” To get back to a post or page’s editing screen, you can find it in the list of all posts or pages and click the title or the “edit” link that pops up below the title; or while viewing the post/page or a preview thereof, click the edit link that appears in the left half of the Toolbar or at the bottom of the post or page content.
Finally, there is an iThemes video about scheduling posts for later publication: